Subscribe Via Email

Like reading this blog? You can get the complete text of the latest articles at Within My Means in your email inbox each morning by entering your email address below, then verifying the subscription. Your address will only be used for mailing you the blog, and each one will include a link so you can unsubscribe at any time.

Enter your email address:

Delivered by FeedBurner

August 19, 2012

Creative Nail Designs: Web Round-up


My web trolling has a new obsession:  nail designs.  I can never grow my nails long enough to accomodate much flashiness, but the designs that have caught my eye lately have spunk and personality.


You can have fun with holidays in simple ways that don't require much talent or control, like these awesome candy-corn halloween nails:


One of my favorite designs lately is this awesome breast cancer support ribbon.  Check out Cindy's site for some more fun ideas.
 

August 18, 2012

Magnetic Photo Puzzle

(Jane, John, Edna, & Rita)

My creativity lately has been focused on care packages, since my mom has been diagnosed with breast cancer and is currently facing radiation treatments.  Luckily she's expected to recover, but since I'm not near her, I've been trying to buoy her spirits with fun mail.  While I'm between shows, I have to be financially cautious, so I've been relying on groupon deals and other similar discount sites.  

Over the spring and summer I've sent my favorite teas, a quilt and bag in a breast cancer pattern, fun holiday stuff around July 4th, Omaha Steaks for my dad (the main caretaker), a cookie bouquet, some beading supplies (her current craft distraction) and a nice pearl necklace.

Today there's a deal for 50% off a magnetic photo puzzle.  I'm reprinting a picture of my mom with her living brothers and sisters that was taken at our family reunion this month.  It was the first reunion I was able to attend in about ten years!  I was so glad to see everyone.  Of 23 living first cousins (my generation), thirteen were in attendance. 

The KGB deal can be found here and the company, Heads Up Puzzles, has several options.  What other ideas for great care packages can you give me?

August 17, 2012

Baked Peach French Toast


I went through some cookbooks at  my Aunt Ann's, and while visiting my folks the one thing I got around to making was this Baked Peach French Toast.  The cream cheese in the recipe makes this dreamy deliciousness.  

The first few pictures are of the assembled casserole before baking.  As usual, I anticipated this so much that I forgot to take a picture before we dug in with gusto, so the only "after" photo I can offer is of the tiny corner which we couldn't touch once we had stuffed ourselves.

I made two 8x8 pans and froze one for later.  I doubled the sauce so each pan will be moist.  The recipe comes from the Carlinville Christmas Market 20th Anniversary Cookbook, 2009 in Carlinville, IL.


April 29, 2012

LABB Bake Sale / Salted Caramel Chocolate Bars


The LA Bread Bakers had a bake sale today to promote the passage of the Cottage Food Law.  I thought I would try something new in preparation for my own bake sale I'm planning for Sponsor Claire.  These Salted Caramel Chocolate Bars over at Kitchen Runway fit the bill.


Salted Caramel Chocolate Bars
(reprinted from Kitchen Runway)
Prep: 10 mins  Cooking time: 30 mins   Yields one 9 x 13 pan of rich goodness
Ingredients
1½ C All Purpose Flour
1½ C Quick Cooking Oats
1¼ C Light Brown Sugar
1 C Regular Butter, melted
½ tsp Cinnamon
1 tsp Baking Soda
1¼ C Semi-Sweet Chocolate Chips
1 19oz of Butterscotch Caramel topping (if you can’t find butterscotch topping – regular caramel topping is fine too.   I find the 16oz jar of caramel topping works well too (mixed with 5 Tbs. of flour).
6 Tbs Flour
¼ tsp Coarse Kosher Salt or Coarse Sea Salt
Directions
  • Preheat oven to 350º,  grease a 9×13 glass baking dish with cooking spray (make sure you get the sides too)
  • Combine flour, oats, sugar, butter, cinnamon and baking soda in a large mixing bowl
  • Press ½ of the flour and mixture into the baking dish, bake for 10 mins
  • Pour caramel topping into a medium size bowl and stir in the 6 Tbs. of flour
  • Pull baking dish from oven, sprinkle chocolate chips over warm crust, pour thicken caramel evenly over the chocolate chips (You can use an offset spatula to help spread the caramel)  Sprinkle the coarse salt over the caramel topping.
  • Crumble the rest of the crust mixture evenly over the caramel topping.  You can gently pat the crumbly crust – but do not press down.  Bake for an another 20 minutes.
  • Let cool completely and then cut into bars.  If you wish – you can sprinkle an additional tiny pinch of coarse salt on top of the crust before it cools completely.
  • Eat, indulge…and repeat!  Ahhhhhh bliss

March 30, 2012

Pysanky Egg Dying for Easter!


This Easter I had the good fortune to learn about a Ukrainian craft technique called Pysanky. The name comes from the verb to write, as you use a stylus (called a kistka) to write with wax on the egg shell.


The eggs are first blown out through holes at each end to be hollow, so they will last indefinitely.

You start with the lightest color, usually white. Everything that you want to remain white, you cover with wax, using the kistka. Then, you dye the egg, in the next dye bath, going in progressively darker colors, and add more wax. Wherever there is wax, the dye will not be able to penetrate. This preserves the part of the design under the wax. In the end, you will have an egg with a great deal of wax on it. Then, using the side of a candle flame, you melt away the wax, revealing the colors that were protected underneath. This results in a brilliantly colored and often very intricately designed egg!


The dyes used in Pysanky are also not your traditional pills-from-a-kit variety that one buys around the Easter holiday in America. These chemical dyes are super saturated, producing noticeably more vibrant colors than regular food dyes. Because the eggs are hollow, they floated atop the dye, unlike the hard-boiled ones I had traditionally been used to, so they had to be spun on the surface of the liquid dye to achieve a uniform look.


Below is an egg from our night that is mostly covered in beeswax, and is in the later stages of dying. The beeswax tended to turn dark from the flame as it melted in the kistka -- you can see that as well on my white egg above that I had just started decorating.


As the wax is melted off of the finished egg, it's absorbed by wiping with a paper towel. The designs are revealed as if cleaning a mirror It's breathtaking to realize the final look.


Our hostess Yvonne created a lovely graphic tonal egg in blues and black that was stunning.


Here's a link to the Meetup event that I attended: http://www.meetup.com/Etsy-Mob/events/55761302/

It was my first time joining the "Etsy Mob" and the people that were there were warm and welcoming artists and teachers. I look forward to getting together with them in the future!

If you'd like to learn more about Pysanky, check out this site with instructions, sources for materials, and patterns: http://learnpysanky.com/

What are some of your favorite Easter traditions, and what are their origins? Please share by leaving a comment on my blog.

March 2, 2012

Grandma Walker's Potato Chip Cookies


Grandma Walker's potato chip cookies are in the oven! I remember her making them for us when we'd visit but this is the first time I've tried them. She always made drop cookies--I'm experimenting with the dough as a bar cookie since I have neither the counter space nor the sink/dishwasher for cookie sheets. I so hope they turn out well as I've been looking forward to them for weeks!

I'm gonna try one or two and mail at least half the pan to my mom, since this was her mother's recipe. Another reason to make them as a bar cookie--they'll fit better in a mailing box. I used sliced almonds because I had them left over from holiday baking, but any nut will do in this recipe. My grandma would've used chopped walnuts. This is one recipe where the quality and freshness of your flour really makes a difference. I only keep one kind of flour in my home--no room for lots of containers--so pretty much everything I make is made with wheat flour. Since I don't cook for a large number of people, I'm learning to scale down my baking supplies and buy smaller quantities more often. Stale flour is no good (though that wasn't my issue today). I had trouble having patience before sampling them straight out of the oven, so they were a little crumbly when cut. After putting them in the fridge to cool, they hardened up and cut quite nicely.

My friends might not know my grandma raised nine children, for long spans of time as a single parent. I love revisiting her depression-era recipes. This typed version was scanned from a cookbook put together at the retirement complex my grandma lived in for years--Round Barn Manor in Champaign IL in the early 1980s.

Potato Chip Cookies

3/4 c. Butter
1/2 c. Sugar
1 Egg Yolk
1 1/2 c. sifted Flour
1/2 c. Nuts
3/4 c. crushed Chips

Mix all together and drop on ungreased cookie sheet. Bake at 350 degrees for 12/15 minutes. Cool 1 minute and sprinkle with powdered sugar.


February 12, 2012

Valentine's Oatmeal Bar Cookies with Cherry M&Ms


At the after-Christmas sales I got some special edition Cherry Cordial M&Ms to set aside for Valentine Cookies. I wasn't sure how I was going to use them. To save time and space in my no-counter kitchen, I decided a bar cookie would be easier than drop cookies requiring multiple cookie sheets, relying on the M&Ms to make them festive.

So after an internet search for an oatmeal bar cookie recipe, I landed on one that called for Raisinets, chocolate-covered raisins. A simple substitution of my cherry candies in place of the Raisinets, and here's what I am sending out to my siblings and my folks.

I also used wheat flour, which is all that I stock in my home, and was glad to find that it didn't make the recipe too heavy.

Raisinets Oatmeal Bars

1 1/2 cups all-purpose flour
1 teaspoon baking soda
3/4 teaspoon ground cinnamon
1/2 teaspoon salt
1 cup firmly packed brown sugar
3/4 cup butter or margarine, softened
1 1/2 teaspoons vanilla extract
1 large egg
1 (14-ounce) package NESTLÉ® RAISINETS® Milk Chocolate-Covered Raisins
1 3/4 cups quick or old-fashioned oats - divided use
  1. Preheat oven to 350°F (175°C). Grease a 13 x 9-inch baking pan.
  2. Combine flour, baking soda, cinnamon and salt in a small bowl. Beat sugar, butter and vanilla extract in a large mixing bowl until creamy. Beat in egg; gradually beat in flour mixture. Stir in Raisinets and 1 1/2 cups oats. Spread into prepared baking pan. Sprinkle with remaining oats.
  3. Bake for 18 to 20 minutes or until golden brown. Cool completely in pan on wire rack. Cut into bars.

Makes 24 bars.

Recipe is the property of Nestlé®.


January 1, 2012

2012 Tournament of Roses Rose Parade Float Decorating!

Catching up on posts that have been in the draft file for quite a long time.... 2012 was the first year I decorated floats for the Rose Parade.  As a 4-H leader for the San Fernando Valley 4-H Club, I supervised our kids in decorating at Festival Artists in Azuza.  It was breathtaking to see all the flowers and the pace everyone worked!  

The Rose Hostess float
The Dragon Head!
China Airlines' "Prosperity And Harmony" float
Eucalyptus Leaves individually applied with glue to prep for dragon fins
Dragon fins applied

San Fernando Valley 4-H

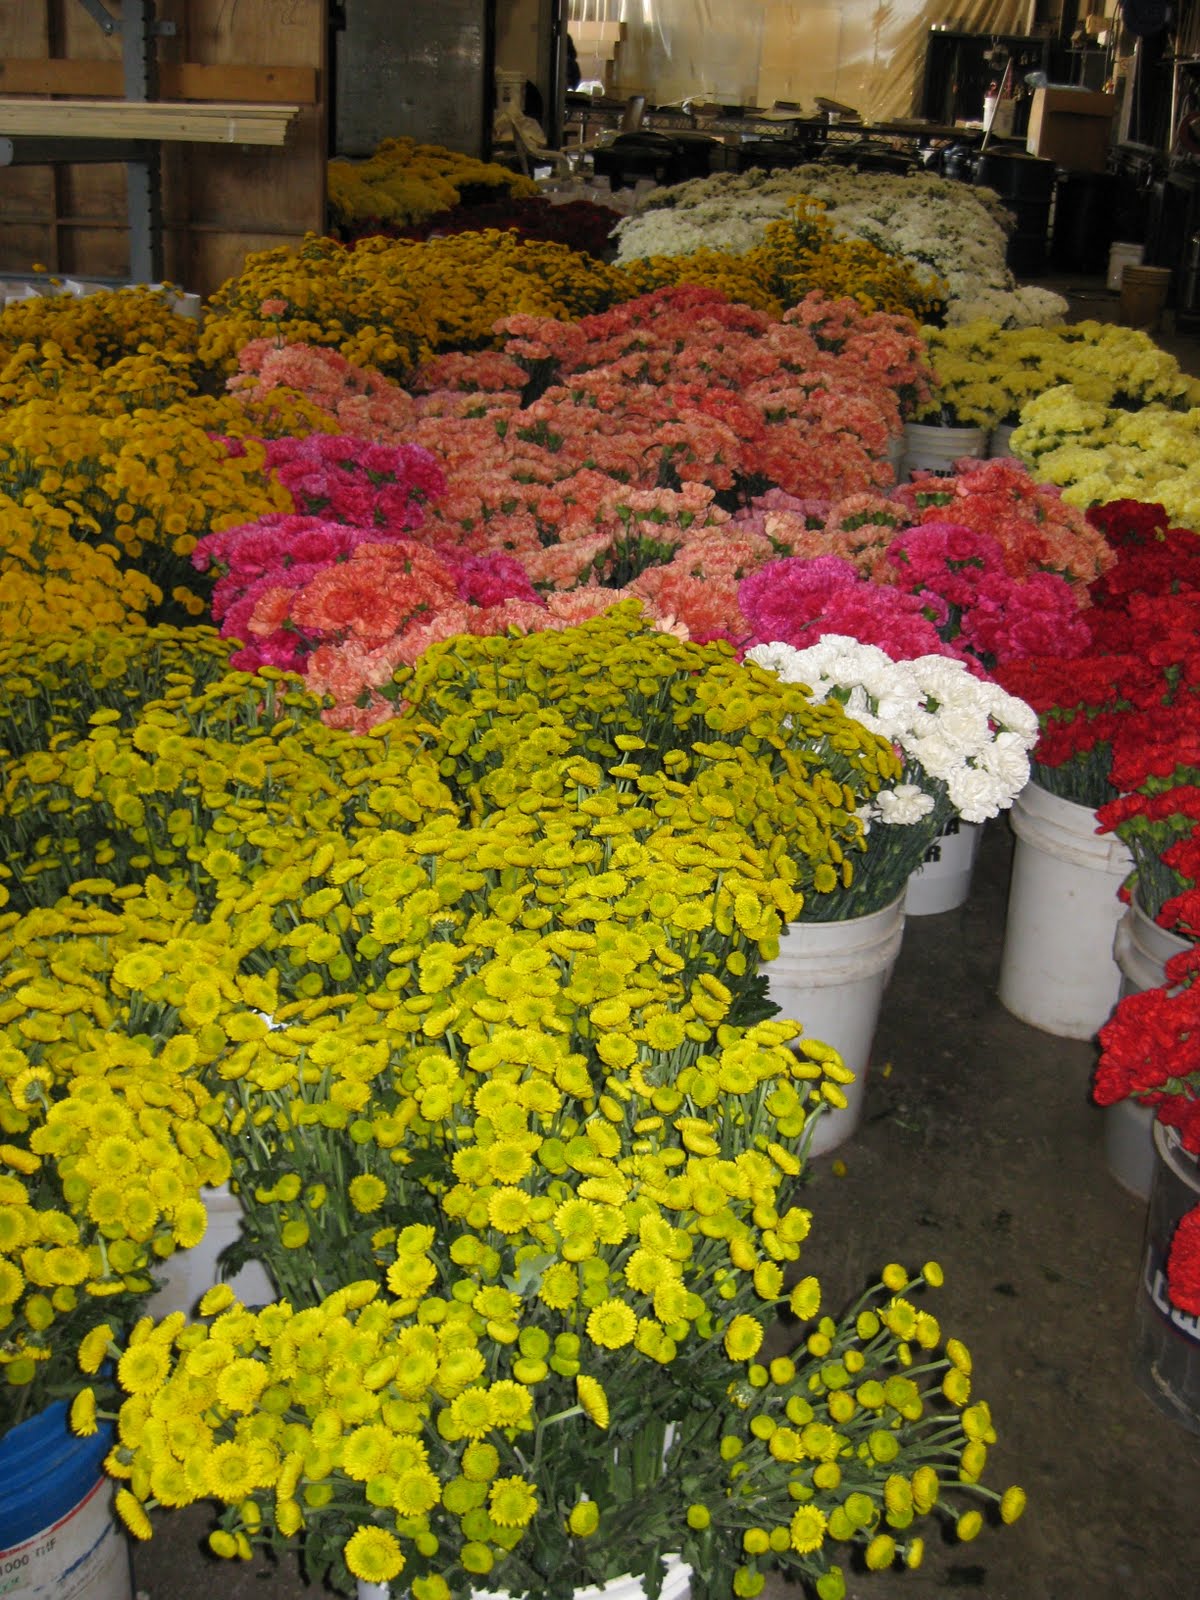
Carnations and Mums waiting for use
Each tub is marked with the float to which the flowers are allocated

December 13, 2011

English Toffee Bars


For a cookie exchange this month I made a bar cookie that I've had every year but never baked myself: my mom's English Toffee Bars. It's certainly one of our traditional cookies each year, and mixing bar cookies with cutout kinds adds visual contrast. This has a shortbread base, with the layer of chocolate and toppings that would be easy to vary if you want to mix it up each time you make it. I use dark chocolate to suit my personal taste and would use cashews on top if I were making it only for myself.


English Toffee Bars

1 c. Butter
1 c. firmly packed Brown Sugar
1 egg
1 tsp. Vanilla
1/2 tsp. salt
2 c. flour
6 plain Hershey Bars
1 c. finely chopped Pecans

Cream butter and gradually add sugar, creaming until light and fluffy. Beat in the egg, then vanilla, salt, and flour. Spread cookie mixture on ungreased 10 x 15 inch jelly roll pan and bake 25-30 minutes in 350 degree oven.

When this comes out of the oven, break up the Hershey bars and set them on top of the cookies. Place back in oven a minute or two, just long enough to soften chocolate. Spread chocolate evenly over cookie crust. Sprinkle with pecans. Cut into bars when cool and chocolate has set.


If you're interested in seeing photos from the event itself, go here. The recipes are posted on various blogs with links below.


December 11, 2011

Plastic Canvas Needlepoint Pen Holders


I've made about a dozen of these pen/pencil holders for Christmas presents this year--fast, easy, and handy to have in your purse or backpack so you can always find your pen. I used a chenille yarn to make them a bit fancier. The box stitch is goes quickly so this project is fun to do while watching television or relaxing in the evening.

What quick projects are you handcrafting for the holidays this year? Please leave a comment or link on the blog! Happy holidays.

December 1, 2011

Day of the Week Kitchen Embroidery


I love the way these embroidered day-of-the-week kitchen towels were recycled as framed artwork! It sets a sunny tone and is a great way to memorialize a relative's handiwork. Whimsical bordering on the kitschy, this is a perfect fit for a dog-walking client of mine.

How do you protect embroidery to make it last through generations? Feel free to leave a comment below, or send your favorite picture to my email!

November 6, 2011

Customized Pet Carrier Purse


This cute little guy has a very inventive mom. She couldn't find a travel/carry pet bag that had the pockets she was looking for, so she bought a regular purse from the gap that was roomy enough for her little pup, cut holes, and hand stitched some plastic canvas of the type used for needlepoint or cross stitch.

The purse was lined, so she was able to insert the plastic canvas in between the layers, leaving the sheet whole for added stability. She made multiple windows on several sides and recycled an insert for the bottom from another bag that she didn't like as well. The purse she used had both handle straps and a shoulder strap, so she's able to loop the bag over one shoulder, or carry it freestyle.

I never thought to alter a purse to make it into a pet carrier. And I love the added pockets in her bag! I'll have to keep my eye out for one that would suit our needs.


October 23, 2011

Halloween Pumpkins 2011


These are my Halloween pumpkins for the year! They're made from kits I bought when I visited Underwood Family Farms earlier in the month. My house sits away from the street, and past homes have been apartments with really only a personal entrance, so I haven't really tried to decorate my doorway often in the past. I have to say, it's making the season so much fun this year!

Because I'm not carving into the pumpkins, I'm hoping they'll last longer, and draw less "critters"--both bugs and the squirrels/racoons/possums/cats that populate my neighborhood. These will also make great centerpieces if I end up hosting a Thanksgiving gathering. And they're recyclable, so I can use them again next year ~ or send them off to a friend's kids.

I think it's a great idea for a metalworker to sell at craft fairs. The small version (the ones I got) of the kits sold for around $15, with a larger version available for $30.

October 13, 2011

Recycled Needlepoint Bags


A few years ago, when my mom was cleaning out her craft cabinet, I took posession of several completed-but-unframed or old and no longer hung cross stitched projects. I pulled them out of their settings and took them to a friend who makes bags, asking her to use them as centerpieces in her creations. I then gave them back to my mom, sister, and aunts as gifts, keeping only these two for myself.

The cross stitched panel on each bag is lined with a protective layer of vinyl. My friend had free reign and picked out cute country prints to line the interior of the bag, as well as choosing the perfect upholstery print for the outside of the bag. She added grosgrain ribbon ties to the top for closure.


The two little dolls were stitched by my mom as an insert for a shelf with a heart shaped cutout, but I like having it in a bag that I can use practically on a daily basis.

The "Eat Dessert First" project is signed by my Aunt Edna, and I asked my friend who designed the bag to keep the signature.


It was fun having something personal and creative to give as gifts that year, and to see the recipients face light up as they realized the history behind the item. My mom uses her purse regularly still.

I've been stealing up finished cross stitches at thrift shops for several years, removing the frames, and setting them aside for my next wave. I'll be including some diaper bags in the mix as I've found lots of cute nursery pictures! I can't wait to see how these recycled items turn out.

Needlework Purse


I haven't had much time for crafting this year in between all the film jobs I've taken, but I'm feeling the holiday season coming and want to get back to it. My yearn for craft time has led me to look around at handmade things I've done, and soak up the inspiration to make time for myself.

Here's a purse I made a couple years ago. For several years I had a project-a-day needlework calendar that I would enjoy looking at. I finally became frustrated that I'd never made anything out of the over 600 projects I'd admired daily, so I picked one and used the pattern to make this little purse.


The stitch count is quite small, so I was glad the size of the project was limited. It took me several months to complete. And with all the work I put into it, I'm afraid to use it on a daily basis! But I do enjoy having handmade items in my home, and find the colors of this project soothing in my bedroom, where it hangs with my other purses. I'm sure the special occasion will come to break in this bag.


How have you used crafting to make practical items you touch and use daily? Please leave a comment on the blog.

October 11, 2011

An Awesome Fall Wreath


I finally took a photo of this fun fall wreath Chance & I have been passing on our walk the last few weeks.

It's delightfully simple--solid colored yarn wrapped around the entirety, with felt diamonds laid atop and held on by twine. Even the hook is handmade, by braided yarn in keeping with the wreath's colors. What a cheery way to welcome fall!

What do the most welcoming doorways you've seen lately look like? Are there any that have impressed you enough to make your own version? Please tell me about it in a comment, or post or send me a photo.

September 22, 2011

Blog Issues


I've been so busy this year, and more practical, dealing with life issues like my dog being sick and getting paperwork like taxes up to date. In August I traded in my eleven year old car, another project that required a fair amount of research. With all that going on, my blogging has been at a minimum, and this site has been on autopilot.

In three years of blogging, I've never been hacked. But for some reason, this month Google has decided this website is Satan, and brandished it with a bright red warning. When I finally sit down to get to the bottom of this issue, it seems to have melted away, only to return when I least expect it.

So if you know of a techno-"expert" fluent in Google or in Blogger, please send them my way. And if you notice a warning on my website, please bring it to my attention by dropping me a note at etrets (at) gmail (dot) com. Thanks for sticking with me.