

I
had heard of JPL's yearly open house for Southern Californians, but the
tickets are obscenely competitive to obtain, so I'd never been. This
year a friend was finally able to secure slots for us, and I got to go.
The Jet Propulsion Laboratory, managed by the California Institute of Technology, is NASA's lead center for robotic exploration of the solar system. Their spacecraft have visited all the planets in our solar system except Pluto. JPL telescopes are observing distant galaxies in the universe to study how our solar system was formed. They also manage the worldwide Deep Space Network, which communicates with spacecraft and conducts scientific investigations from its complexes in California's Mojave Desert near Goldstone; near Madrid, Spain; and near Canberra, Australia. JPL cameras and sensors are aboard satellites circling Earth to study the ozone, oceans and other Earth sciences. To support continued exploration, JPL is making advances in technology with new instruments and computer programs to help our spaceships travel further and our telescopes see farther than ever before.
The Jet Propulsion Laboratory, managed by the California Institute of Technology, is NASA's lead center for robotic exploration of the solar system. Their spacecraft have visited all the planets in our solar system except Pluto. JPL telescopes are observing distant galaxies in the universe to study how our solar system was formed. They also manage the worldwide Deep Space Network, which communicates with spacecraft and conducts scientific investigations from its complexes in California's Mojave Desert near Goldstone; near Madrid, Spain; and near Canberra, Australia. JPL cameras and sensors are aboard satellites circling Earth to study the ozone, oceans and other Earth sciences. To support continued exploration, JPL is making advances in technology with new instruments and computer programs to help our spaceships travel further and our telescopes see farther than ever before.
At "Explore JPL," visitors had the
opportunity to see, among other things, a life-sized model of InSight -- the
next mission to Mars, scheduled to launch in May -- and Mars rovers, plus JPL's
machine shop, where precise parts are made for spacecraft. The event coincided
with the 60th anniversary of NASA. The agency was created in 1958.
I expected to be spending time from building to building filled with cold scientific equipment, so I wore several fall layers and headed out for the day sans snacks, expecting no snacks to be allowed in labs, and knowing there was lunch available for purchase. I started the day at a double disadvantage: we were in the middle of a heat wave, and the event was largely outdoors. And due to the capped time window of the day, we hardly stopped to eat, so snacks would have saved my attitude.
The open house lasts from 9a-4p, with timed entrance. Our tickets were for 930a. But because each exhibit has a wait much like Disneyland, the lines were closed around 3p. So we had just under six hours to maximize all we could take in, and prioritize what we wanted to see most. My friends were routed to a different entrance than I, essentially on the other side of the property. So we picked a point halfway in between, and arbitrarily decided to start with "Universe Plaza."
Site 10 - Universe Plaza
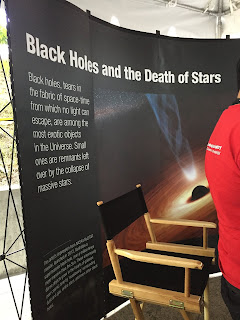
This exhibit explained how NASA missions explore the universe, studying stars, black holes, and distant galaxies. Among the topics explained were Dark Energy, Dark Matter, Black Holes, and the birth and death of stars and galaxies. I was excited to see that the topics were explained in a relatable manner even to someone who was not scientifically inclined. There were a lot of retired scientists volunteering to staff/teach throughout the day. The individual topics that made up this courtyard exhibit seemed like they were ready made presentations to be taken out to middle school and high school science fairs, and the subjects were captivating.


Site 12 - Spacecraft Fabrication Facility
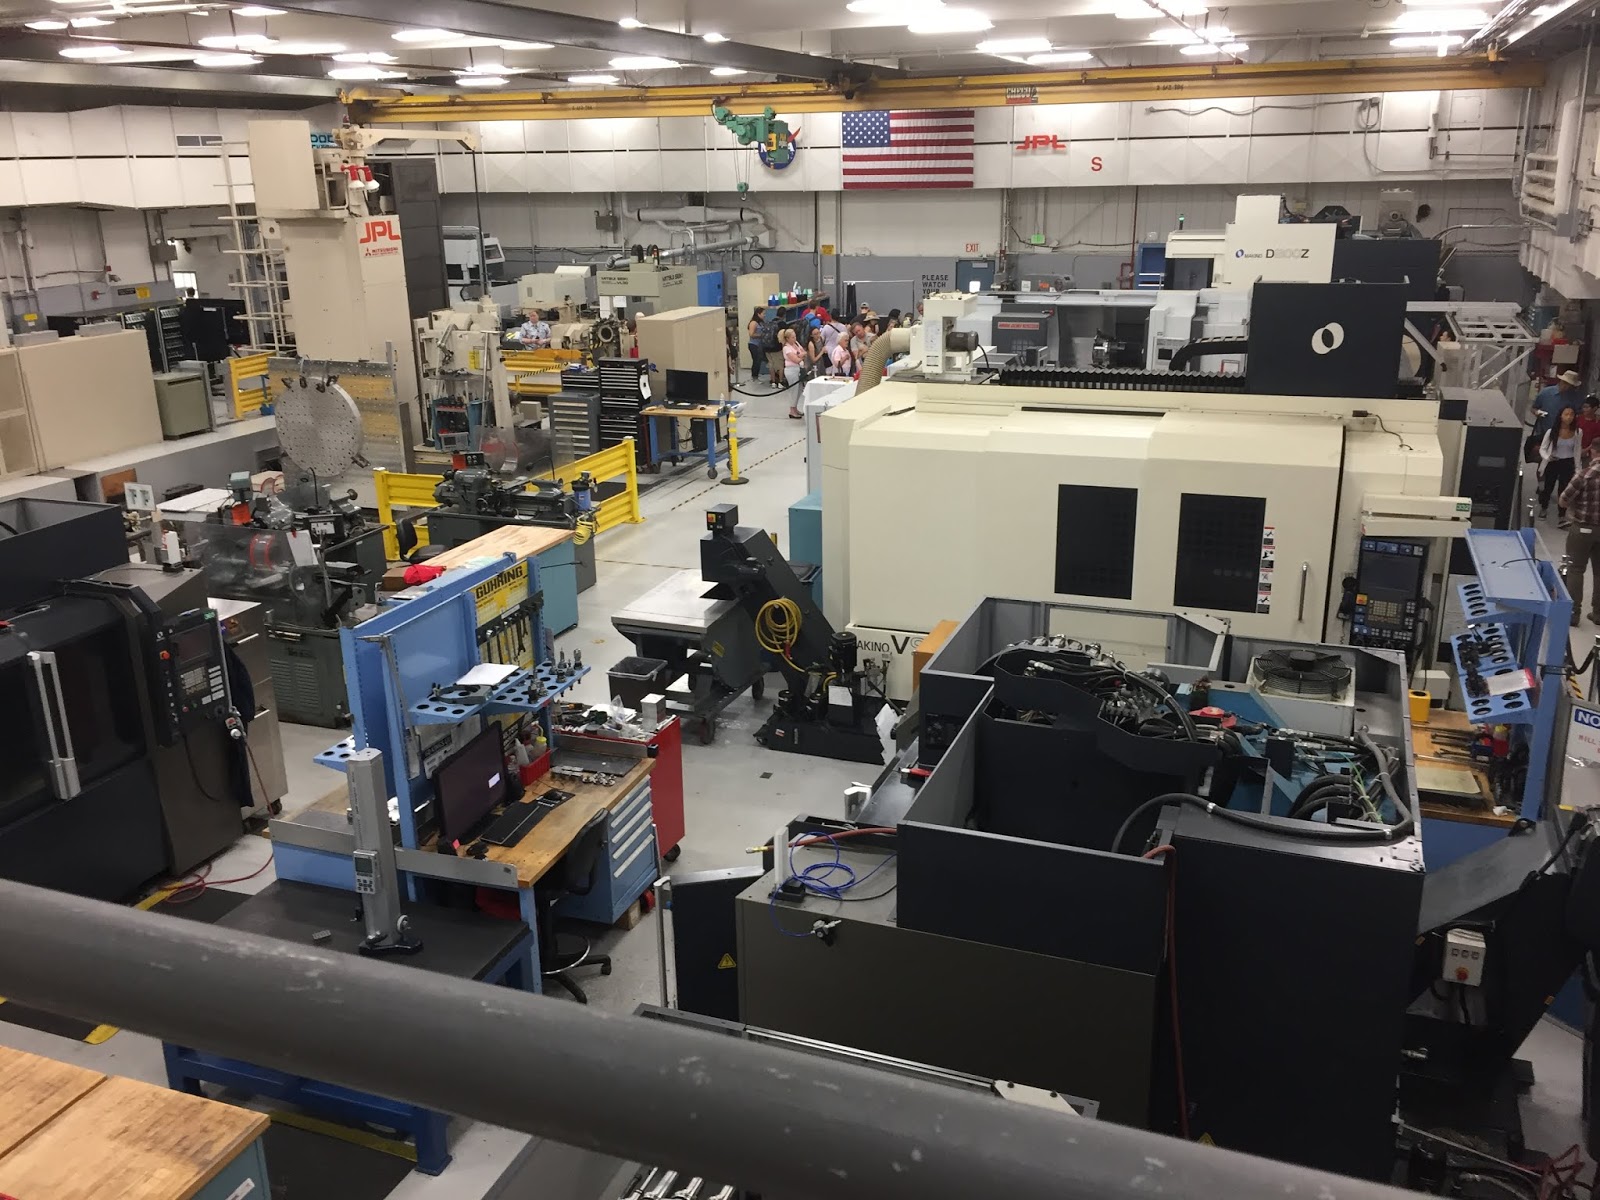
Otherwise known as the machine shop, this building was enthralling to see where and how parts are fabricated for use on spacecraft. Different levels of 3-D printing are often utilized before making the actual item, so the operators can visualize exactly what they are making. There were lots of tactile items in the demonstrations and the building is home to several huge fabricating machines.


Site 13 - Mobility & Robotic Technologies
The robotics display was one of the most popular with kids, so it was hard to get close enough to the scientists to hear them explain the displays. But it was fun to see young people so excited about science! There were several rovers used for different purposes. Having gone to the fabrication exhibit first, I was doubly impressed as I had a sense of what it took to build each rover.


Site 3 - Space Flight Operations Facility (Mission Control)
On the walk over to Mission Control, I came across a board which listed all of the JPL missions. The mission control exhibit was one of the longest waits, at about 45 minutes, but the line was in a tented area for shade cover, and it moved quickly.


Site 17 - Microdevices Laboratory
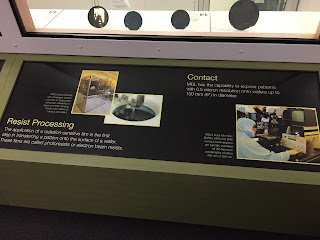
My last stop of the day was a really cool one, and where I wish I had more time left. Next year I'll make this a priority as there was so much information to take in. Microdevices included scanning, photography, and printing as well as micromechanics. The long hallway had displays on either side, and specialized labs behind each display.


 I'm
absolutely adding this event to my calendar as a priority yearly
activity. I'm making an effort to get out and enjoy Los Angeles this
year, with a focus on all the things I can't find elsewhere. JPL's
Explore day fits that goal.
I'm
absolutely adding this event to my calendar as a priority yearly
activity. I'm making an effort to get out and enjoy Los Angeles this
year, with a focus on all the things I can't find elsewhere. JPL's
Explore day fits that goal.
I expected to be spending time from building to building filled with cold scientific equipment, so I wore several fall layers and headed out for the day sans snacks, expecting no snacks to be allowed in labs, and knowing there was lunch available for purchase. I started the day at a double disadvantage: we were in the middle of a heat wave, and the event was largely outdoors. And due to the capped time window of the day, we hardly stopped to eat, so snacks would have saved my attitude.
The open house lasts from 9a-4p, with timed entrance. Our tickets were for 930a. But because each exhibit has a wait much like Disneyland, the lines were closed around 3p. So we had just under six hours to maximize all we could take in, and prioritize what we wanted to see most. My friends were routed to a different entrance than I, essentially on the other side of the property. So we picked a point halfway in between, and arbitrarily decided to start with "Universe Plaza."
Site 10 - Universe Plaza
This exhibit explained how NASA missions explore the universe, studying stars, black holes, and distant galaxies. Among the topics explained were Dark Energy, Dark Matter, Black Holes, and the birth and death of stars and galaxies. I was excited to see that the topics were explained in a relatable manner even to someone who was not scientifically inclined. There were a lot of retired scientists volunteering to staff/teach throughout the day. The individual topics that made up this courtyard exhibit seemed like they were ready made presentations to be taken out to middle school and high school science fairs, and the subjects were captivating.


Site 12 - Spacecraft Fabrication Facility
Otherwise known as the machine shop, this building was enthralling to see where and how parts are fabricated for use on spacecraft. Different levels of 3-D printing are often utilized before making the actual item, so the operators can visualize exactly what they are making. There were lots of tactile items in the demonstrations and the building is home to several huge fabricating machines.
 |
| wheel made for the Mars rover |
 |
| 3-D printing of plastic parts, with the lab visible behind |
 |
| Gentleman discussing & demonstrating all the different 3-D printing machines and materials used. |
 |
| Gentleman discussing all the different types of fabric and layers used on all surfaces |

 |
| Machine shop from the balcony around the top edge, where offices and conference rooms are located. |


 |
| Brand new metal 3-D printing lab |
Site 13 - Mobility & Robotic Technologies
The robotics display was one of the most popular with kids, so it was hard to get close enough to the scientists to hear them explain the displays. But it was fun to see young people so excited about science! There were several rovers used for different purposes. Having gone to the fabrication exhibit first, I was doubly impressed as I had a sense of what it took to build each rover.


Site 3 - Space Flight Operations Facility (Mission Control)
On the walk over to Mission Control, I came across a board which listed all of the JPL missions. The mission control exhibit was one of the longest waits, at about 45 minutes, but the line was in a tented area for shade cover, and it moved quickly.


It
turns out the line moved quickly because this exhibit is little more
than a quick photo op. Mission control is the center for all data
collection for space objects worldwide, as JPL is contracted for other
nation's space programs as well. A tour guide explained the various
desks in a sixty second blurb as we were quickly ushered round the
room. Still, it was an experience to witness and imagine what my daily
life would be as a JPL employee.


Site 17 - Microdevices Laboratory
My last stop of the day was a really cool one, and where I wish I had more time left. Next year I'll make this a priority as there was so much information to take in. Microdevices included scanning, photography, and printing as well as micromechanics. The long hallway had displays on either side, and specialized labs behind each display.


