Subscribe Via Email

Like reading this blog? You can get the complete text of the latest articles at Within My Means in your email inbox each morning by entering your email address below, then verifying the subscription. Your address will only be used for mailing you the blog, and each one will include a link so you can unsubscribe at any time.

Enter your email address:

Delivered by FeedBurner

December 24, 2019

Holiday Greeting 2019


Merry Christmas and Happy New Year from Ellen, Claire, and Callie!  Claire is 15 or so this year - adopted 13-plus years ago, and I am conscious of every day I have with her.  So I am appreciating the holidays even more this year.  Callie is celebrating her second Christmas and first adoptiversary with me.  She is my cuddlebug.  I appreciate all the friends and family who support us and include us in their lives.  Sending wishes for peace and joy throughout 2020, with hopes for new opportunity around every corner. 

December 23, 2019

Umami Deviled Eggs


My friends at Melissa's World Produce have wonderful blogger events througout the year, usually involving a cookbook demo and signing.  But their Christmas party is the event I look forward to each year, as the agenda is turned over to the bloggers themselves, with a dessert competition and an appetizer competition.  

This year, I was out of town for Thanksgiving with my family, then came home to begin a job that ended two days before Christmas.  I took a day off work to attend the Melissa's event - that's how important it is to me - but had little time for baking.  So I didn't get to enter the dessert competition, but I did manage to enter the appetizer competition with Umami Deviled Eggs.  

At Easter in my family, my uncle always brought the deviled egg plate.  And you never knew which one would contain an unseemly amount of some hot spice, meant to prank my dad or his brother.  Now that my uncle has passed, the task of making them has been handed slowly over to my mom, but I've never been invited to pitch in.  So I'd actually never made a deviled egg until the morning of the competition.  

One of my favorite vegetables is mushrooms.  While grocery shopping I came upon a product called Chaga Mushroom Powder.  I wasn't sure how I would use it, but I was intrigued, and I bought it.  Wanting to put a twist on the regular deviled egg for the competition, the mushroom powder came to mind.  Would it make a savory complement to a more common recipe?  I had to try it out.  They turned out wonderfully!  The color is dark due to the mushroom powder, but if you know what's in the dish, it's not off-putting.  

On the day of the competition, I couldn't find a cake decorating tip in my kitchen.  I drove to the location with the bag of filling separate from the eggs.  It's a good thing I did, because driving on LA freeways, I was forced to come to a sudden stop, and the plate of hard boiled eggs went flying in my car!  I lost half the servings I was planning to have for the competition, but this meant I had plenty of filling for the eggs that were left.  I made sure to demo the Chaga Mushroom Powder next to my dish so all the taste testers would know to expect a savory flavor profile and would understand the dark coloring.  If I were making this again for my own home holiday party, I might experiment with food coloring for the filling.


Umami Deviled Eggs

18 cooked hard boiled eggs, peeled
1/2 cup mayonnaise (I like Kraft Real Mayo)
2 Tbsp lemon juice
1 tsp Chaga Mushroom Powder
1/2 tsp Smoked Paprika
1/4 tsp dried mustard 

Halve the hard boiled eggs and empty the yolk into mixing bowl. Wash the eggs for presentation when filled.  Add all other ingredients to mixing bowl and combine.  Put a decorating tip onto a ziploc bag and fill the bag with the mixture.  Pipe the mixture into the eggs for an appealing look.  Garnish with parsley, paprika, or any other herb if desired.  


Do you serve deviled eggs at other occasions besides Easter?  What ingredients are in your favorite recipe? 

July 16, 2019

Watercolors Week Four - Shadows

my painting
This week's watercolor lesson was about painting shadows.  I arrived after the lecture, so just took a stab at it, with occasional comments from the instructor.  My sample painting also had a lot of white in it, which I really haven't learned to approach as of yet.  I did have fun mixing paint pigments though, and each lesson teaches you something.  I am stretching way out of my comfort zone this summer, and I'm proud of myself for that.

The sample painting I was assigned to copy

Our instructor gave us a handout with paint "recipes" she uses to create shadows, and emphasized that while they are darker shades, shadows reflect the color of the object they are projecting.

the full image that I was copying, though I cropped my drawing

July 8, 2019

Watercolors Week Three — Gimmicks

the professor's demonstration in class
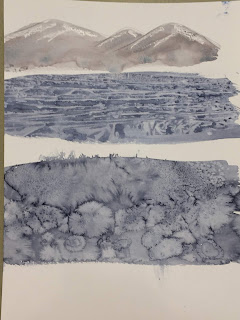
In today's watercolor class, we learned to use candle wax, saran wrap, and salt (table salt, rock salt, or margarita salt) to create textured effects in our watercolors.  The professor called today's lesson "Gimmicks."  I had such fun trying them all out.


In class I came up with a quick little picture to illustrate all three techniques.  This is a project I could use with 4-H kids, and I bet they'd enjoy playing with the different mediums.  It also demonstrates shading, as I mixed three different green colors for the tree itself.  

The first of the instructor's techniques that she demonstrated was using plain wax from a normal tapered candle.  Using the candle as a pencil before applying any paint creates a resist, where the waxed areas will not accept the paint.  The instructor demonstrated this by using wax to portray snow on her mountaintops.  In my little holiday tree painting, I used wax to highlight an area of the star where I wanted some shine.

In the second technique demonstrated, paint is first applied.  While the paint is wet, a piece of saran wrap is "stretched" so that it gets small lateral folds in the plastic wrap.  this is laid on top of the area, and smoothed out by hand.  I should have taken a photo of the plastic wrap while it was lying on my painting.  Once dry, or at least mostly dry, the plastic wrap is lifted off of the painting, leaving texture to the paint.  The instructor demonstrated this technique as a way to add life to water, whether horizontal, or vertical as in a waterfall.  In my painting I used it to give texture to my tree boughs.  The photo doesn't show it well but there is actually texture to all three shades of green.  

Lastly, the instructor had salt in three different gradients for us to play with as a way to add texture.  Table salt, Margarita salt, and Rock salt were shaken lightly across wet paint.  Instantly, the salt would soak up the pigment.  After the painting has dried, the salt can be wiped away.  If left on a finished work displayed over time, the sodium could eat into a canvas.  In a casual painting such as my holiday one, I found no need to wipe it away.  I liked the rough texture left on the tree trunk in my painting.

the sample painting from the instructor that was my assignment to copy.
I was supposed to spend the class time painting one of the instructor's samples that could be used to demonstrate the techniques she had shown us.  But after doing my simple original drawing, I didn't have a lot of time to do a full-blown assignment.  

I spent 30 minutes or so doing a quick impression of the painting above, and used some salt to make the colors bleed a little.  Next week, I'll play along a bit better with the assignment.

July 5, 2019

Acrylics Week Two - Painting!


I started a masterpiece today in my Acrylics painting class that I'm taking this summer through Burbank Parks and Rec.  This was my second class session, though technically it's the fourth, since I missed the first and third sessions due to work.  

I did some homework since the last class and sketched my photograph of my beloved pup Caitie.  I'd also bought a desk easel.  I found it easier to paint with the canvas flat on the table, but it was helpful to have the photo I was painting upright in front of me. 

I could have started painting at home, but I wanted the input and guidance of our instructor.  He suggested starting the painting with the eyes and nose, as the major body parts would give some form to what I was doing.  I took his advice, but also wanted to paint the backdrop, so that when I did the dog's fur, I wouldn't lose the fuzziness of the edges by having to paint the backdrop afterward.  The opportunity to break in a full new set of paints was luscious.  It was fun to mix my own color shades beyond the twenty four colors the kit provided.  

To look at the painting, I feel like I've only put in two percent of what will be needed to finish it.  But at least I've begun.  I'm excited to see all these progress photos next to each other when I'm finally done. 

July 4, 2019

Watercolors Week Two - Color Palettes


In this week's watercolor class, our instructor  Ms. McDonald gave a lesson on color palettes and the use of expressive color and shading.  She explained that she'd taken lessons from the local painter Joseph Stoddard, and used his examples to explain vivid use of color to us.  In her lecture, she quickly painted the tree above as an example, mixing several shades of greens intuitively, then showing how Stoddard would use a dark color to illustrate branches against a light background, and switch to a light branch by removing or scraping the paint when it's against a dark background. 


Above and below are a couple of books by Joseph Stoddard.  I took pictures so I can look them up on paperback swap or Amazon to get my own copies. 


Stoddard's paint palette is mixed from the colors above.  Below are a couple examples of his work that I loved.  The photo is above his interpretation of the Mission San Luis Obispo.  The last is Phillipe's French Dip restaurant in downtown Los Angeles. 


Our instructor had Prismacolor Col-Erase 20048 Black pencils at each station that she said were easy to sketch the outline of our drawing because the pencil lines could be easily erased after we were done without damaging the watercolor paints. 

We had three handouts on color combinations:


Just as last week, our instructor had a sampling of photos and clippings we could choose from as an example to paint.  The idea was to change the photo to our own color interpretation.  Above is the one that I chose, before I knew the purpose of the assignment.  I actually chose it because I liked the tones in the photo, and the idea of a yellow house.  After the lecture, we had about an hour, or a little more, to do the assignment in class.

I tried to do clouds as I'd seen the instructor demonstrate, by blotting with a paper towel or tissue paper.  My clouds retained the grid pattern from my paper towel.  I wished I'd had more time to play.  Some students continue working on the assignment at home during the week; I doubt I will make time for that during this course.  Mostly I left with a sense of creative inspiration from this class.  It will take some practice to feel like I've learned technique.

my painting

June 26, 2019

Watercolors Week One - Reflections


I made it to my first session of the Painting with Watercolors class offered through Burbank Parks & Rec at the Betsy Leuke Creative Arts Center classroom.  It's actually the second week of the course, but I missed the first session due to work.   A ten week summer session was $95, with an extra $10 fee because I'm not a Burbank resident. 

This class is close to my heart as I'm getting to use art supplies that belonged to my late uncle, Dick Rosentreter.  Dick was a museum curator at the Illinois State Museum and an artist by education. He passed away following an epileptic seizure in 1986 at the young age of thirty-eight.  My sister had his art supplies for many years before passing them on to me.  I organized them but never really used them for about fifteen years.  I have a large piece of his artwork hanging in my living room, over my couch, so I think of him daily.

The watercolor course taught by Pam McDonald is welcoming but structured. A demo and critique is given each week on class and/or individual paintings.   Each week will have a theme for the lesson.  In today's class we studied reflections.   A materials list was provided prior to the session; we brought our own paints, paper, and brushes. But the instructor had small magazine clippings that went with her theme which we could choose from as inspiration to paint. 


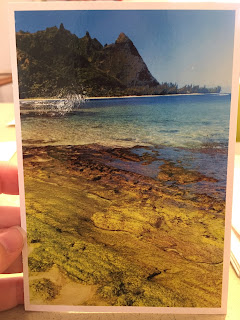
Above is the magazine clipping that I picked from the instructors selection's.  Actually, the teacher picked it for me when I asked her which one from the array would be easiest.  I wanted an entry level project as I had no prior experience.  See the little chips in the water?  I thought that the clipping was just so old it was flaked and degrading.  So when I painted it, I actually had the inspiration drawing upside down.  Thus my painting below looks like it is backward left-to-right.   

It was fun to mix colors from a basic palette to make shades of green/blue/yellow.  We were encouraged to work quickly and impressionistically, without paying too much attention to shape or detail.  The professor showed me how to make the lines in the reflection to show the movement of the water, and to underline them with a darker color for better effect.

I'm really not at all impressed with the work I did on this assignment but again I'm willing to share it in the hopes that I'll see improvement once I compare my last assignment at the end of the course.  I'm keeping in mind that this endeavor is for fun, learning, and relaxation this summer.  Can't wait to see what else I learn in the next eight weeks!

June 25, 2019

Hesby House Garden 2019 -- Irises and Dahlia


I have a brief update on the 2019 garden.  Since I lost all of my in-ground beds when the new owner took over the property about two years ago, I haven't talked much about gardening.  But I do have a few things in pots, and am pleased with what has survived.

It was painful to have to dig up everything I'd tended for years and give them away to friends.   My most special bulbs went to a friend that had just bought a house, in hopes that someday I can get starts back from her.  

I grew four kinds of tomatoes this year, planted mid-March, but the cold weather gave them a late start.  They're also in pots, and as predicted Sungold Cherry has been my most prolific producer.  I've gotten four or five Pineapples, and my the other two are just starting to fruit.  

My dahlia is nothing more than a stick in a pot for three quarters of the year.  ever winter I think it's dead, but leave it alone to give it one more shot, and in the spring lo and behold! a shoot pops up.  This year the flowers are only about two feet tall, but they are happy and seeking sun.


memorial flags for Caitie on left and Chance on right
I have two raised garden beds about three feet by two feet that are filled primarily with herbs.  Along the back corner are two kinds of container grapes that are promising but the California weather has been so uneven the past few years that they've managed to survive but not really thrive.  My herbs are lemon balm, sage, garlic chives, thyme, and sometimes rosemary.  The back half of the first bed is filled with a few irises.

My mint pot with a bird trellis

One of the irises from my old garden bloomed this spring right in front of the memorial flag to my beloved Chance.  It was him smiling at me, I'm sure. 


I bought three new irises from Armstrong Gardens this spring, and one bloomed immediately.  It's called "Apricot Silk."  I also located an Iris Society in the San Fernando Valley just in time to attend their spring sale.  So I have three new member-grown Irises that I hope will root this year and flower next spring. 

Bearded Iris "Apricot Silk"

June 24, 2019

Acrylics Week One


Having tried a basic drawing class at Barnsdall Art Barn, I'm ready to move on to more specific techniques.  I loved my instructor at Barnsdall, but he takes summers off of teaching to return to Europe.  

Since I'm still learning fairly universal and basic skills, I decided to look closer to home at Burbank Parks & Rec for summer classes, and chose two:  a Watercolor class, and a class in Painting with Acrylics.  Both are only ten minutes down the street from me at the Betsy Lueke Creative Arts Center classroom.  I missed the first watercolor class due to work, but was able to make it to the first session for the acrylics course.  The goal of the acrylics class is to "create paintings that explore your artistic vision and discover techniques with the help of a visionary artist with three decades of professional experience."  Our instructor, Johnathon Gallagher, was warm and welcoming to our first class, even making popcorn for the group.  The class is no more than 10-15 students, sitting in a u-shaped row of tables.  The materials list included a tabletop easel, canvas, and starter set of acrylic paints and brushes, some of which I already had.  The eight-week course was $88, with an extra $10 fee because I am not a Burbank resident (I live in the neighboring area of North Hollywood).


I made it to the first class, but was really burnt out from six straight days of work.  I didn't have an easel yet.  The materials list mentioned a canvas no bigger than 16x20.  Because I don't have much wall space in my apartment, I decided to start small, and just bought a package of four 8x10 canvases.  Most folks in class seem to be working on bigger projects.  


The Betsy Lueke Creative Arts Center building is a beautiful studio with professional showings of community work.  The classroom is an open space in the corner of the studio.  There's a small courtyard in back, and a separate smaller outbuilding housing the pottery studio.  The CAC is adjacent to a park, so there's a sizeable parking lot and greenspace out front.  It's a bright, cheery place to come to learn. 
  
I did have something in mind--it's time to do a portrait of Caitie, the pup I lost last September to a bee sting.  Since she was only five when she passed, I hadn't yet gotten a painting done of her.  And I'd love to match ones I have of Chance and Claire, done by a professional artist.  Those are 8x10 so that's who I bought the size of canvas that I chose.  

Anyway, I went to the first class expecting a bit of an introduction, lecture, inventory of what supplies were needed for what purpose.  Instead our instructor Johnathon works by allowing us to paint, and offering help only where needed.  It seemed most of the people in the room were continuing students that knew the plan.  I took some time to pick the photo that I wanted to work from, and tried to sketch it out with his help.  I didn't bring the printed out photo to sketch from, but was instead trying to draw from viewing the photo on my tiny phone.  That was the biggest mistake.  While I liked my first instincts, there were a few parts of my drawing I was unhappy with.  When I asked for advice, the instructor erased the parts I was most happy with, and drew his own version of the face that I didn't think showed her personality.  I felt the drawing was taken over and I wasn't happy with the results.  So I scrapped it in favor of sketching in the quiet of home.  

My goal with the homework assignment was to sketch out my portrait of Caitie so that I can start painting in class tomorrow.  A Sunday afternoon is a perfect time to sketch.  But I think my new pup Callie understood that I was sad, missing Caitie, as I studied her photo.  She stuck to me like glue, even sitting on my chest, making it difficult to draw.  So I took a break for some puppy snuggles, and finished a bit later.  I was glad I chose to sketch in daylight.  I'll feel good going into class tomorrow prepared. 

June 16, 2019

Pasadena Chalk Festival 2019


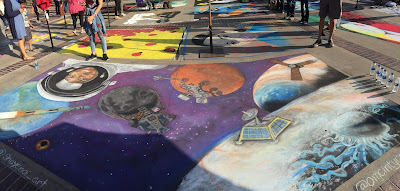
The Pasadena Chalk Festival didn't disappoint once again in 2019.  This annual fest held on Father's Day weekend each year at Paseo Colorado in Pasadena is so much fun to wander.  The artists work in front of the public.  The festival is judged and the public weighs in with text voting.  

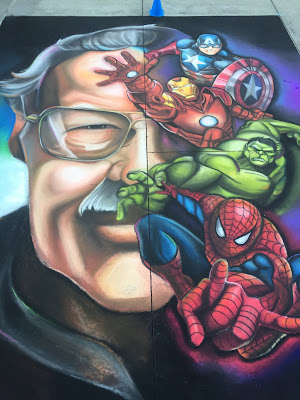
Some of my favorites this year are the ones surrounding this text, as well as the tribute to Stan Lee, and a few dog themed pictures.   If you couldn't make it there, I thought you'd enjoy seeing my photos from the event.